Another session of cardmaking this week!! Three examples of our first sketch. There were several iterations before I established this sketch was the one.
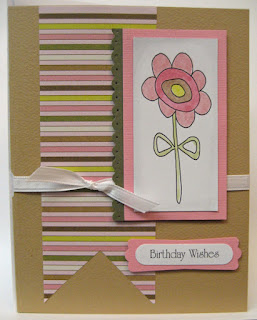
We started with a 2" x 5.5" piece of decorative paper. We snipped a V in the bottom of it
and glued it to the left on our card, The laser printed images were watercoloured and layered onto a coordinating layer. We added a border on the left hand side. After positioning the image we added our ribbon. We laid the ribbon in place, penciled the spine with its position and used a slot punch to nip a tiny bit of cardstock which created a tiny slot for the ribbon. We inserted one end of the ribbon in the slot and adhered the end to the inside front using double sided tape. We did the same with the other end. The piece we trimmed off was tied to the front with one knot to simulate a bow. The focal element was then adhered with 3D foam tape over the ribbon. The laser printed greeting was punched out (Word Window - SU) and layered onto a label punchie (Modern Label - SU) in the same colour as the image. The oval greeting was cut using Nestibilities and the image is from
Melonheadz.
The images are all digital : the light house -
CLKER, the graphic flower -
Digital Doodling and the vintage flower -
Digital Two for Tuesday. I love sharing cardmaking with my friends and it is always a good time when they come over to play!!
Therese


No comments:
Post a Comment
Please leave your comments