Wednesday, July 19, 2017

A birthday card with a collage feel

I created two sets of cards last week as a prize for a family event and packaged them in Ferraro Rocher chocolate boxes.  You can check them out here!!
This card is part of the cards I had started creating before I decided to make cards that fit in the #8 envelopes which fit so perfectly in those beautiful clear boxes!!
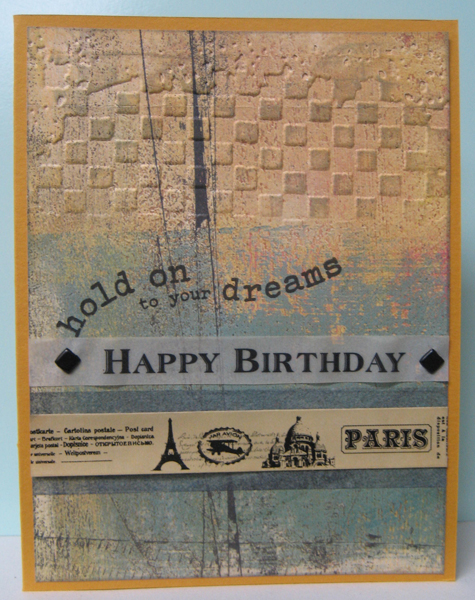
I started with a background from a calendar which my sister gave me years ago.  I had dismantled it but the paper was so cool I had saved it in my stash of background papers.  I found it in a box this week and thought I would see if I could make a card with it.  It was already a bit distressed and interesting so I decided to work with that!!  I used a TH embossing folder and embossed only the top portion and used light gray stamp pad to highlight the texture I had added.  I did all the edges as well.  I added a strip of handmade faux washi tape with a bit of a blue tinge and overlaid a piece of Paris themed commercial washi tape over it.  I stamped "hold on .... dreams" using my black Versafine stamp pad.  Wow!! It worked so well and was such a nice solid black!!  Finally I added a vellum birthday greeting with two square brads and glued this whole element to an orange/yellow card front.

Therese

Birthday Card Set - a background created with stripes of decorative paper and cute little cupcake digital image

I have been making card for a gift and if you want all the details of why and how you can check out this post.
For this card I started with a white card but you cannot see any of it because I created my background right on the front of the card from edge to edge.  I started with the little strawberries from my stash and added several other papers that coordinated then added two stripes of red cardstock.  I still needed one and figured it should be green to coordinate with the strawberries and I found a scrap of this green polka dot paper and I thought it was perfect!!  So I played with the layout and then glued them all in place one at a time trimming them to the edge of my card.  I watercoloured my laser printed greeting (Melonheadz) using coordinating colours and added it to my card front using 3D foam tape.  The plain red stripe needed a bit of something so I added pink and green sequins to it using glue dots - that was better.  Now, the green one looked a little plain so I added two lines of clear glitter gel pen and some pink daisy punchies as well.  They were calling for clear rhinestones even before I got them all in place.  I used the clear glitter gel pen to add dots to the little scallops on the strawberry strips.  Finally, I just had to add some clear heart bling to the last strip of pink decorative paper which seemed to complete the design.  Way more blinged up that what I usually make but I am sure a little girl will be most pleased on her birthday to receive this cool blingy card on her birthday!!

Therese

Birthday Card Set - a fun cupcake digital image with some very graphic decorative paper

Yet another card for the set!!  Click here to get all the details on why and how I am making these cards.

For this card I started with a dark brown card and combined two pieces of coordinating decorative paper to create a background.  I added a thin strip of brown cardstock over the place where they joined which gave the whole card a very dramatic look!!  I watercoloured the cute cupcake (Melonheadz) with shimmery watercolours in very subtle shades to coordinate with the background.  I added a thin border to the image using a dark brown permanent marker to help it stand against the bold paper before adhering it to my card front with double sided tape.  I added a bit of shading to the laser printed oval greeting, layered it onto a brown oval punchie and adhered it to the front of my card using double sided tape.  Really love how this one turned out!!

Therese